
Last updated November 22, 2026
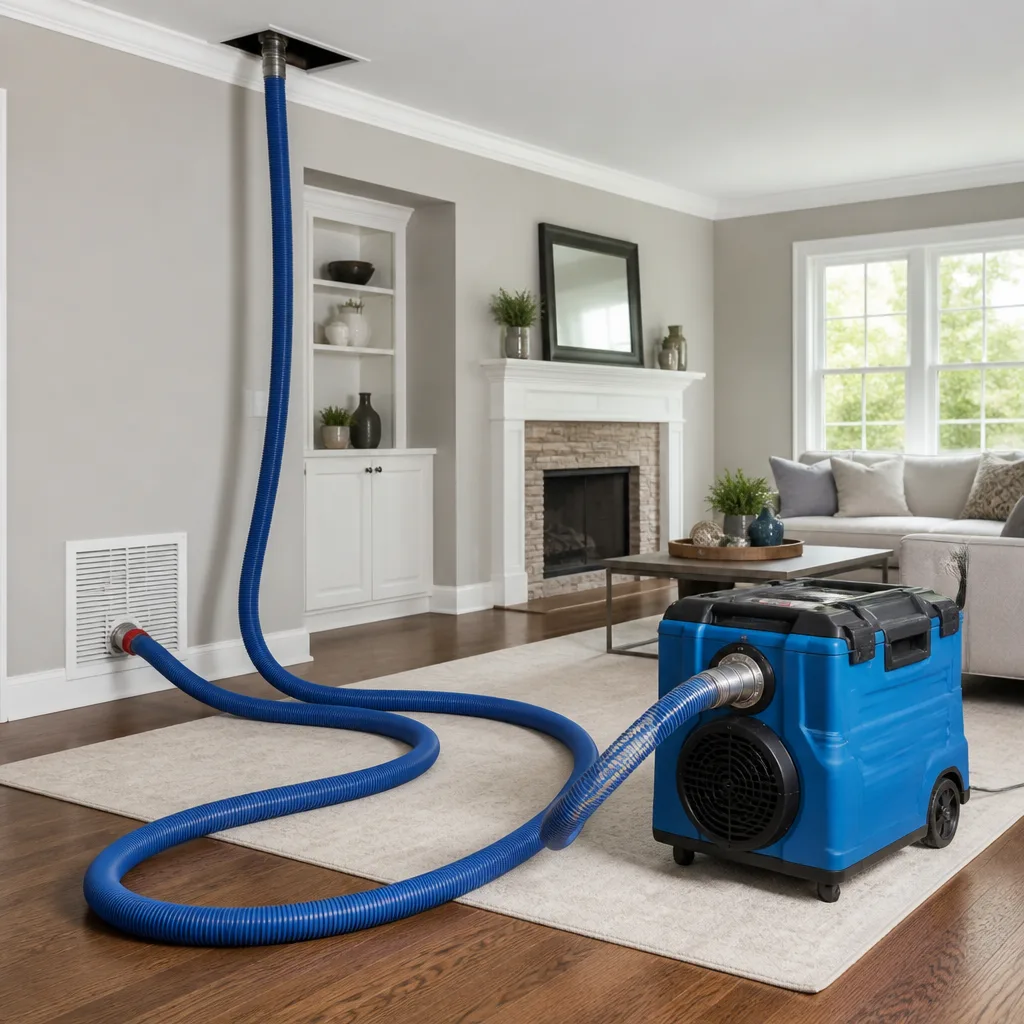 Whole-home duct cleaning
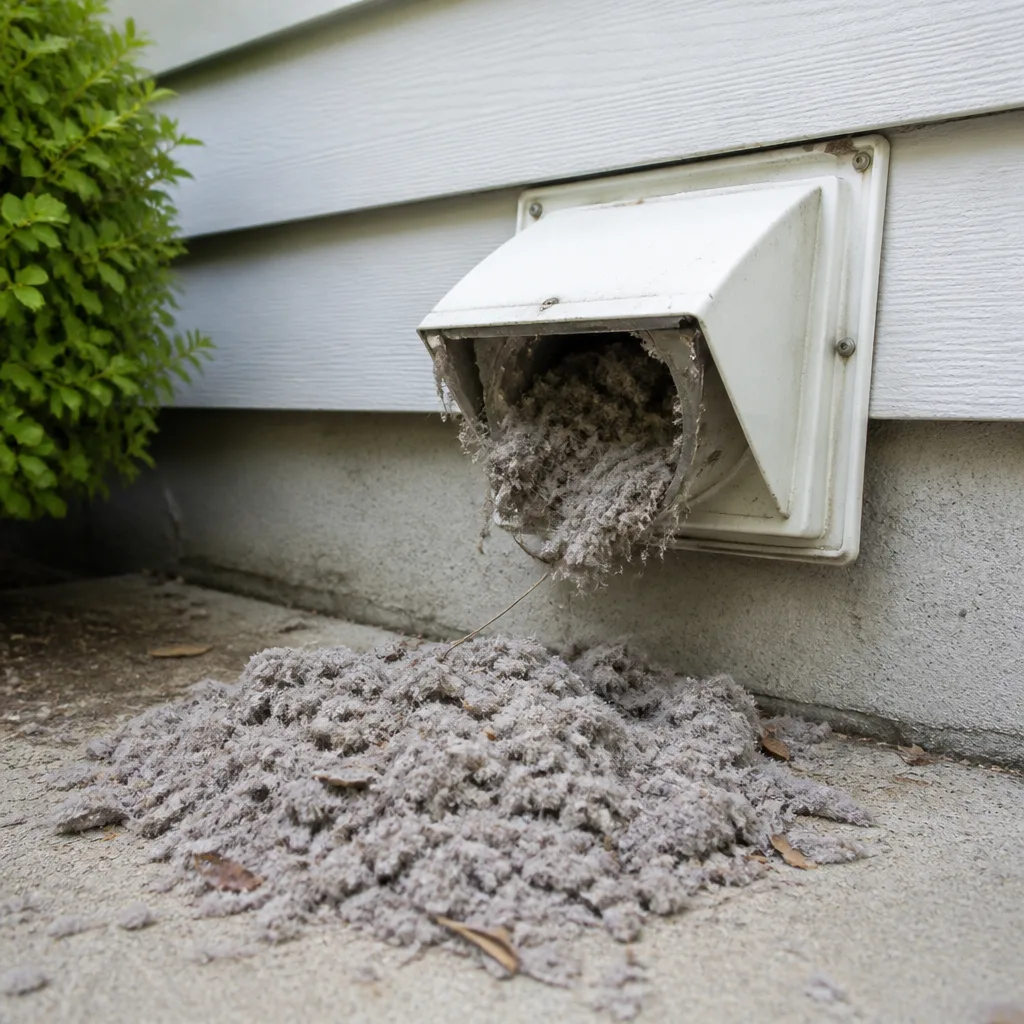 Dryer vent cleaning
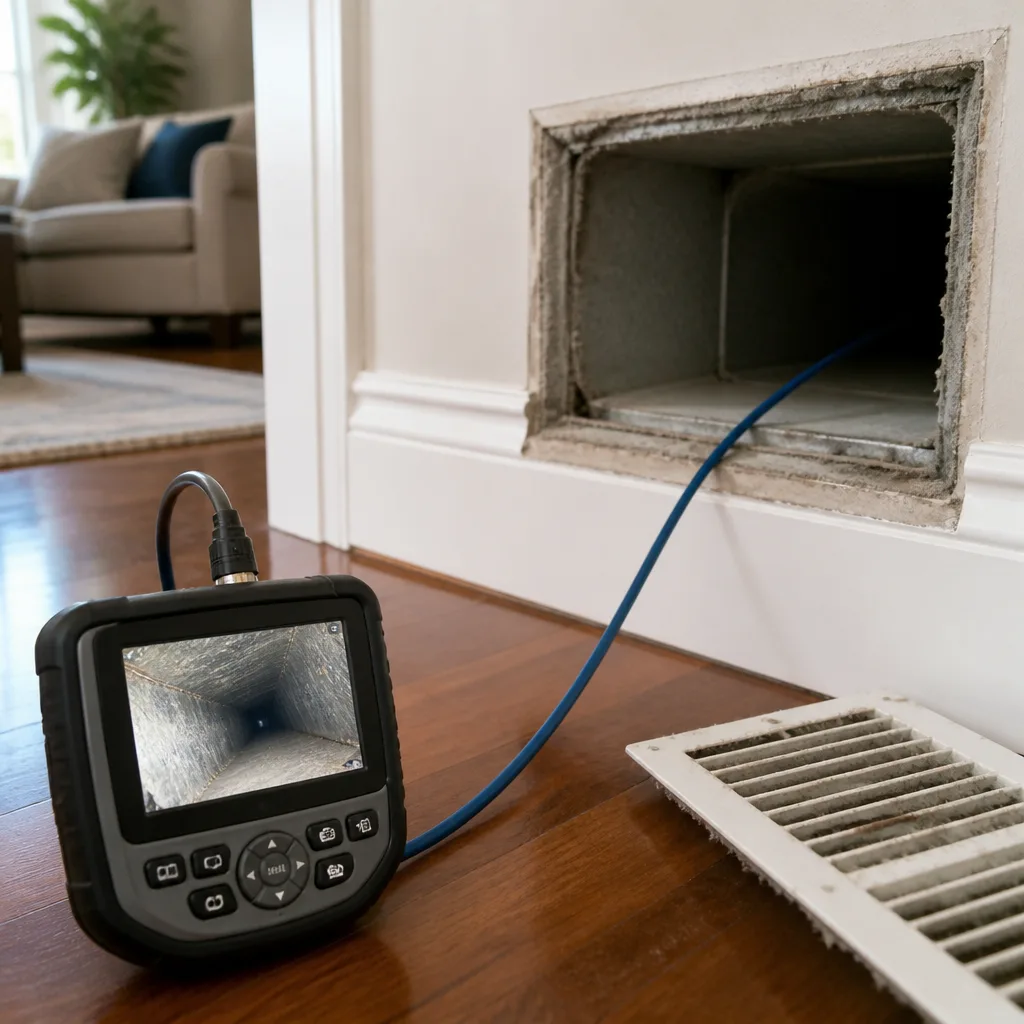 Camera inspection
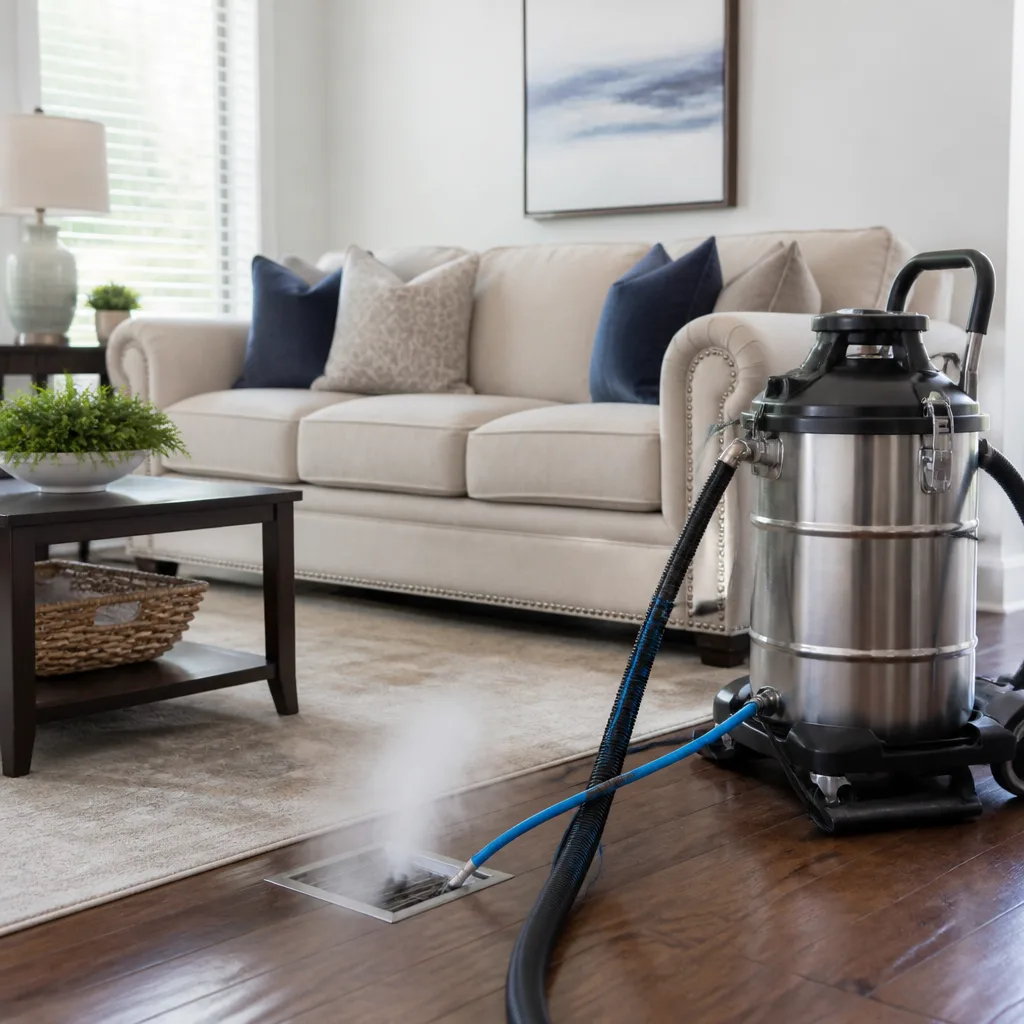 Sanitizing & deodorizing
Whole-system duct and dryer vent check with before-and-after photos - you see exactly what came out of your vents
That "$99 whole-house special" is a bait ad - the real number appears once they are in your hallway, or the "clean" is a shop-vac at the register. We photograph the inside of your ducts before and after instead.
DIY vs Professional Air Duct Cleaning: The Inwood Homeowner’s Decision Guide
Here’s the part most DIY air duct cleaning articles skip: the vacuum you can buy at a hardware store moves roughly 60 to 80 cubic feet of air per minute. The negative-air machine a professional brings to an Inwood home moves 2,000 to 4,000 CFM. That gap isn’t a marketing number. It’s the difference between a machine that can pull loose dust toward a hose and a machine that can actually lift settled debris out of a duct system and hold it in a HEPA filter. Physics doesn’t care how determined you are or how many tutorials you’ve watched. This guide walks through what you can honestly do yourself in an Inwood home, what genuinely requires professional equipment, and how to measure whether either approach changed anything.
Quick Answer
Most Inwood homeowners should do the small, safe tasks themselves – register cleaning, filter changes, dryer vent lint removal, and a visual camera check – and call a professional for main trunk line cleaning, interior liner agitation, coil cleaning, and sealed-system sanitizing. The dividing line isn’t confidence or budget. It’s negative pressure: professional HEPA-rated equipment generates airflow that consumer vacuums can’t match, and without it, DIY cleaning mostly redistributes debris rather than removing it.
Styles & brands we work with
- Whole-home duct cleaning
- Dryer vent cleaning
- Camera inspection
- Sanitizing & deodorizing
Table of Contents
- What a Homeowner Can Legitimately Do
- What Requires Professional Equipment
- The Specific Risk in Inwood’s Older Homes
- Why Negative Pressure Is the Whole Ballgame
- When Partial DIY Plus Targeted Service Makes Sense
- How to Measure Whether Your Work Changed Anything
- How to Pick an Inwood Duct Cleaner
- Common Mistakes to Avoid
- When to Call a Professional
- Frequently Asked Questions
What a Homeowner Can Legitimately Do
There’s a real list of duct-related work a homeowner can do safely and usefully. We’re not going to tell you that everything needs a truck in the driveway, because that isn’t true and it wastes your money. The tasks below are within reach for a careful homeowner with a few basic tools, and doing them well actually reduces the work a professional needs to do later.
Register cleaning and grille washing. Supply and return registers collect dust faster than the duct behind them, because air passes through at speed and drops fine particles at the grille face. Removing the screws, soaking the grilles in warm soapy water, and wiping the register boot with a damp cloth removes a visible layer of debris without touching the duct interior.
Dryer vent lint removal. This is the one DIY task with a genuine safety payoff. According to the U.S. Fire Administration, roughly 2,900 home clothes-dryer fires happen each year, and failure to clean the vent is the leading contributing factor. Pulling the flexible connector behind the dryer, vacuuming out the lint trap housing, and clearing the reachable length of the vent run are tasks a homeowner can do. Dryer vent cleaning is a separate professional service when the run is longer or runs through a wall cavity, but the short, accessible section is yours to handle.
Filter upgrades. Filter changes don’t clean ducts, but they slow recontamination after any cleaning. Upgrading from a thin fiberglass filter to a pleated filter with a higher MERV rating is a straightforward homeowner task, and it’s one of the highest-value things you can do for indoor air quality without calling anyone.
Visual inspection with a camera. A phone camera on a short stick or a cheap USB borescope can look inside a register boot and a few feet down a branch run. What you’re checking for: visible dust matting on the interior walls, mold growth, pest evidence, disconnected joints, and torn ductboard. You’re gathering information, not cleaning. That information is what lets you talk to a contractor from a position of knowledge instead of hope.
None of these tasks require special equipment, and none of them risk damaging your system if you’re careful. They also won’t clean a main trunk line, which is where the real work lives.
What Requires Professional Equipment
Some cleaning tasks can’t be done with consumer equipment no matter how well-intentioned the effort. The reason is usually airflow or containment, and both are equipment problems before they’re skill problems. Here’s what genuinely requires professional-grade machinery.
- Main trunk line cleaning. The large rectangular or round duct running from the air handler through the house is the backbone of the system. It collects the most debris and it’s the hardest to reach. Cleaning it properly requires a negative-air machine connected at one end pulling the full system into a HEPA filter while an agitation tool works the interior from the other end. A shop-vac placed at a single register can’t create that pressure differential.
- Interior liner agitation. Duct interiors develop a bonded layer of dust, skin cells, and lint that doesn’t lift with suction alone. Professional equipment uses rotating brush heads and air whips to break that layer loose so it can be captured. Consumer attachments spin far slower and can mar flexible ducting.
- Coil cleaning. The evaporator coil inside the air handler is a dense fin pack that traps debris and grows biological material when it stays damp. Cleaning it requires coil-safe chemicals and a rinse that doesn’t flood the plenum. This is part of HVAC cleaning, and it’s not a homeowner task.
- Sealed-system sanitizing. Applying a sanitizing treatment to the interior of a sealed duct system requires understanding what’s downstream, what’s compatible with the equipment, and how to reach the full interior without introducing moisture to a place it can’t dry. Guardsman-grade sanitizing treatments are made for this, but only in the hands of someone who understands the system layout.
- Duct repair and sealing. When a joint is disconnected or a run is torn, cleaning first then sealing is the correct order. Neither is practical without professional containment and injection equipment.
For the tasks above, the professional equipment stack matters. Our technicians use Rotobrush and Nikro duct cleaning systems, and Abatement Technologies containment equipment that maintains negative pressure throughout the job. Those brand names come up because they’re the tools NADCA-aligned contractors specify – not because they’re flashy. A consumer vacuum cleaner is a dust appliance. These machines are built to remove contamination from a sealed air system without spreading it into the room air.
The Specific Risk in Inwood’s Older Homes
Inwood has a large share of pre-war and mid-century housing stock, and the duct systems in these homes are frequently original galvanized steel or ductboard construction. Both materials are less forgiving than modern flex duct, and both are easy to damage with the wrong tool or the wrong technique. This is the reason a well-meaning DIY attempt in an Inwood home can end worse than doing nothing.
Original galvanized ducts. Galvanized steel develops a dull zinc coating that, after decades of service, becomes thin in spots where moisture has condensed. A homeowner brush spun at high speed against that surface can gouge through the coating and expose bare steel. Bare steel in a duct system rusts, and rusted steel sheds particles into the airstream. It also creates a rougher surface that future debris sticks to more readily. The surface damage isn’t visible from the register, and it isn’t cheap to fix once it’s happened.
Ductboard systems. Ductboard is a rigid fibrous board with a foil or coated face and exposed fibrous interior. It’s common in mid-century Inwood homes and additions. The interior face is soft and unforgiving. A spinning brush in the hands of someone without ductboard experience will shred the interior surface, which then sheds fibers into your conditioned air. Ductboard damage also can’t be repaired with tape – the affected section has to be replaced, and that’s a professional repair.
Older flex connections. The short flexible sections connecting rigid trunk to registers in many Inwood homes have been compressed or stretched by decades of settlement. A shop-vac nozzle jammed into a compressed flex section can tear the plastic liner, and the tear won’t show up until the next heating season when you notice uneven airflow or dust settling on a windowsill.
The pattern in older Inwood housing is this: the ducts that most need cleaning are the ones most easily damaged by the wrong tool. That’s an argument for professional service on the main lines, not an argument for skipping the work. It’s also a reason to ask any contractor how they treat galvanized and ductboard systems before you hire.
Why Negative Pressure Is the Whole Ballgame
Every professional duct cleaning setup is built around a single idea: put the whole system under negative pressure so debris moves toward the machine, not into your living room. This is sometimes called source removal, and it’s the difference between cleaning and stirring.
Here’s how it works in practice. A negative-air machine, usually HEPA-filtered, is connected to the system at one end – often at the air handler or through a main trunk tap. That machine pulls the entire duct system’s air toward itself and captures what it carries. Then a technician works the system from the other direction with agitation tools, dislodging debris that then gets drawn into the machine. Every branch, every main line, every return gets worked while the system is under continuous vacuum.
A homeowner with a shop-vac is doing the opposite. Suction is local, weak, and often not HEPA-rated. When you agitate dust inside a duct with a brush or a shop-vac hose, some of it goes into the vacuum, some of it falls back onto the duct floor, and some of it puffs out into the room through the register you’re working at. That last part is the one nobody wants to think about. You’ve moved contaminants from inside the system to inside your breathing space.
The numbers make the point. A consumer shop-vac runs roughly 60 to 80 CFM. The negative-air machines we use, Abatement Technologies and similar HEPA units, run in the 2,000 to 4,000 CFM range – the same order of magnitude as the system airflow itself. That’s what makes genuine source removal possible, and it’s also what makes containment (keeping dust inside the machine) viable. Without containment, cleaning is theater.
The practical takeaway: if your goal is to actually remove accumulated debris from the trunk lines and main runs, the equipment you have access to determines the answer more than your effort does. For a minor register cleaning, your vacuum is enough. For the trunk line, it isn’t.
When Partial DIY Plus Targeted Service Makes Sense
For some Inwood homeowners, the smartest move isn’t full DIY or full professional service. It’s a split. DIY the small tasks, hire out the parts that require equipment, and structure the scope so the professional job is smaller and cheaper than an all-in service call. This works when your goal is a specific problem – a renovation dust episode, a musty smell, a dryer vent that’s running long – rather than a whole-house reset.
Here’s how to structure that scope, in order:
- Do the DIY prep first. Pull and wash every register, replace the filter with a fresh pleated one, and clear the accessible dryer vent length. This eliminates the surface debris a pro would otherwise spend time on.
- Document what you see. Photograph each register boot, and use a borescope to capture a short video down the longest branch run. Note where you see matted dust, moisture, mold, or a disconnected joint. This is the information a contractor needs to quote accurately.
- Request a targeted quote, not a full-house box. Ask specifically for main trunk line cleaning, coil cleaning, and a visual inspection of the branch runs. If sanitizing is needed because of mold or odor, ask about that separately. A contractor who only quotes a whole-house package without looking at your documentation isn’t listening.
- Ask what equipment will be used and where the negative-air connection will be made. A legitimate answer will name the machine (Rotobrush, Nikro, Abatement Technologies are common and real), describe how the system will be put under negative pressure, and explain where the HEPA filter captures debris. A vague answer is a red flag.
- Ask for before-and-after evidence. Request photos or a short video of the trunk interior before and after cleaning. On a proper job, this is a natural part of the workflow. “See the difference before we leave” is a reasonable standard to hold any contractor to.
- Address repair and sealing separately if needed. If the visual inspection turns up disconnected joints, torn flex, or failed sealant, that’s a repair and sealing scope, not a cleaning scope. Doing both in the same visit is common, but they should be quoted separately so you know what each costs.
This structure respects your time and your wallet. It also turns a duct cleaning call from a leap of faith into a scoped, verifiable job. Plenty of Inwood homes only need the targeted scope – especially apartments and smaller houses where the duct system is short and the branch runs are minimal. Whole-house cleaning is the right call when the system is broadly contaminated, but it isn’t the only correct answer, and a good contractor will tell you so.
How to Measure Whether Your Work Changed Anything
The most underused tool in residential air quality is a simple handheld anemometer, which costs less than a good lunch and measures airflow velocity at a register in feet per minute. It’s the objective way to answer a question that otherwise gets answered by vibes: did that cleaning actually change anything?
Here’s the before-and-after protocol. Do it on a day when the outdoor temperature is stable and the HVAC system has been running for at least 15 minutes so airflow has settled.
- Record a baseline. At each supply register, hold the anemometer face against the grille and record the reading. Do the same at each return. Write the numbers down with the register’s location. Note the outdoor temperature and which mode the system is running (heat, cool, fan only), because airflow varies by mode.
- Do your cleaning. Whatever your scope – DIY register cleaning, DIY dryer vent clearing, professional trunk and coil cleaning, or some combination.
- Wait until conditions match. Re-measure on a day with similar outdoor temperature and with the system in the same mode. Measuring cool-mode airflow one day and heat-mode the next tells you nothing useful.
- Compare. A meaningful improvement is consistent across multiple registers and larger than day-to-day variation, which is usually a small percentage. A single register improving while others stay flat usually means that register was blocked locally, not that the trunk cleared.
What you’re really measuring is whether the system got more open, not whether it got cleaner. Cleaning removes debris but doesn’t necessarily restore airflow unless debris was actually restricting it – and in badly contaminated systems or systems with disconnected ducts, that’s exactly what’s happening. An improvement of a few percent is noise. A decade of matted dust in a trunk line can show up as a meaningful gain after cleaning and repair, particularly if a disconnected joint was also resealed.
Airflow isn’t the whole story. If your problem was odors or allergy triggers, the metric to watch is whether the symptoms and smells return – which is why sanitizing and repair-and-seal work exist as separate services from cleaning. Filter loading rate is another real signal: a filter that used to clog in a month and now lasts three is telling you the system is shedding less debris. Track that too.
How to Pick an Inwood Duct Cleaner
If you’ve decided some or all of this job needs a professional, the next decision matters more than the price. Duct cleaning is an industry with a wide gap between the equipment-serious operators and the shop-vac-with-a-logo crowd, and the two are often indistinguishable on a website. Here’s what to look for.
- Named equipment. Ask what machine will be used. Answers like “Rotobrush” or “Nikro” or “Abatement Technologies” mean something. Answers like “our state-of-the-art system” mean nothing – the tool has a brand name and the contractor should know it.
- Negative pressure and HEPA containment. A serious contractor will explain where the negative-air machine connects, how the system is sealed during cleaning, and how debris gets captured in a HEPA filter. Get this in writing if you can.
- Scope, in writing. The quote should specify which components are cleaned: main trunk lines, branch runs, returns, air handler, coil, blower. A quote that just says “duct cleaning” is a quote that will be negotiated on-site after the truck arrives.
- Before-and-after evidence offered, not requested. Photos of the trunk interior before and after should be a standard part of the job, not a favor. If a contractor can’t show you what they cleaned, you have no way of knowing whether it was cleaned.
- Repair capability. If the inspection turns up a disconnected joint, torn flex, or failing sealant, does the contractor fix it, or do they clean around it? Repair and sealing capability, plus compatibility with Honeywell and Aprilaire system accessories, is a sign of a contractor who understands whole-home air systems rather than isolated duct runs.
- Sanitizing as a named service. When the problem is mold, allergens, or odor at the source, cleaning alone won’t solve it. A contractor who offers Guardsman-grade sanitizing treatments as a distinct service knows the difference between removal and remediation.
The cheapest bid you’ll get in Inwood – typically the one with the coupon on it – usually comes from exactly the operator who fails most of these checks. The lower price is real; the reason for it is that the job is smaller. Per-vent pricing creates an incentive to move fast, clean little, and upsell on-site. Ask instead for a single flat price for the whole system with the scope written out, and expect that price to reflect the actual equipment and time involved. Air duct cleaning done right in Inwood is a scheduled job with a defined scope, not a race through the house.
Common Mistakes to Avoid
- Cleaning only the branches and skipping the trunk lines. The visible dust at registers comes from the trunk, so cleaning the branches while leaving the trunk loaded just refills the branches. If you’re going to clean, clean the source.
- Using a shop-vac with the hose jammed into a register. It seems harmless, but a shop-vac can’t move the volume of air needed to clean a trunk line and often just stirs dust loose into the room. It can also scratch galvanized interiors and tear older flex connections, which is a real risk in Inwood’s pre-war and mid-century housing stock.
- Spinning a rotating brush inside ductboard. Ductboard has a soft fibrous interior face, and a brush at high speed shreds it. Damaged ductboard cannot be repaired with tape – the section has to be replaced. Leave ductboard interior agitation to a technician who does it regularly.
- Sanitizing without fixing the moisture problem first. Mold and musty odors come back when the moisture source wasn’t addressed. Cleaning and sanitizing only works as the last step of a moisture fix, not the first step of a cosmetic one.
- Skipping the dryer vent because it’s “not HVAC.” The dryer vent is a leading cause of residential fires. A blocked dryer vent isn’t an inconvenience you can ignore until spring – it’s a safety issue that belongs on an annual list.
- Ignoring the visual inspection and hiring a contractor blind. If you haven’t looked inside your ducts, you don’t know whether you’re looking for cleaning, repair, sanitizing, or none of the above. A ten-minute camera check changes the whole conversation.
- Booking the coupon-price visit. A low upfront price with per-vent billing is a bait-and-switch pattern, and it usually ends with a punch-list of on-site upsells. Ask for a single flat price for the whole system based on a documented scope, or walk.
When to Call a Professional
Certain situations genuinely require professional service rather than a homeowner’s best effort. Call for professional help when you see visible mold growth inside a duct or on the interior of an air handler. Call when you smell musty odors from the supply registers that don’t clear after you’ve replaced filters and cleaned the registers. Call when a visual inspection with a camera shows matted dust lining the trunk line, pest evidence, or a disconnected joint. Call for anything involving the evaporator coil, the blower, or the air handler interior – these are part of HVAC cleaning and belong to a technician. Call before doing anything that involves spinning a brush inside ductboard or galvanized duct. And call when the dryer vent run is long, hidden inside a wall, or already showing restricted airflow.
Air Duct Cleaning Inwood offers free estimates in Inwood – call (855) 974-7305. We answer 24/7. Fast dispatch from 7am to 7pm, Sunday through Friday. The estimate is free, the scope is written, and the price is set per job.
Frequently Asked Questions
Professional air duct cleaning in Inwood is priced per job based on the size of the system and the scope, and the written estimate sets the final price. The best way to get an accurate number is to document what’s in your system – register photos, a short camera video – and request a targeted quote. Call (855) 974-7305 for an exact quote; estimates are free.
You can clean registers, grilles, and short accessible flex runs with a shop-vac, but you can’t clean trunk lines. A consumer vacuum moves roughly 60 to 80 CFM, and clearing a trunk line requires 2,000 to 4,000 CFM of contained negative pressure. Shop-vac cleaning of a trunk usually just redistributes dust into your room air, and the shop-vac nozzle can scratch galvanized interiors or tear older flex. Call (855) 974-7305 for a targeted quote on the trunk lines; estimates are free.
Cheap quotes are usually based on per-vent pricing, which incentivizes a fast, shallow pass and an on-site upsell for anything real. A legitimate quote for whole-system cleaning reflects actual equipment (Rotobrush, Nikro, Abatement Technologies units are typical), the time required for agitation and containment, and the scope of the main trunk lines. Ask for one flat price for the whole system with the scope written out. Call (855) 974-7305 to see what an honest quote looks like; estimates are free.
Ask for before-and-after photos or a short video of the trunk interior. A serious contractor expects this request and provides the evidence naturally. If a contractor can’t show you what changed inside the ducts, you have no way of knowing what was cleaned. Call (855) 974-7305 and ask what evidence the job includes; estimates are free.
For most Inwood homes, every three to five years is a reasonable baseline, and it’s driven more by what’s actually happening in the system than a fixed calendar. New construction or major renovation, a pet-heavy household, a system that’s never been serviced, or visible mold growth in the ducts all shorten that interval. Annual dryer vent cleaning is the one task that shouldn’t be on the multi-year cycle. Call (855) 974-7305 to talk through what your system actually needs; estimates are free.
Yes, and this is often the smartest split. DIY register cleaning, filter upgrades, accessible dryer vent lint removal, and camera-based visual inspection. Hire out main trunk line cleaning, coil cleaning, interior liner agitation, and any sanitizing or repair. Structure the professional scope as targeted rather than whole-house, and quote the repair and seal separately if it’s needed. If you’re pairing your own partial DIY with a professional scope, please also see our Air Duct Cleaning Inwood page for the service overview; call (855) 974-7305 for a combined estimate; estimates are free.
The Bottom Line
The DIY-versus-professional question for duct cleaning turns out to be about equipment, not effort. A homeowner can honestly do a lot: registers, filters, dryer vent accessible sections, and a camera check that produces real information. What a homeowner can’t do is generate the 2,000 to 4,000 CFM of contained negative pressure required to actually clean a main trunk line, and Inwood’s older galvanized and ductboard systems punish the wrong tool more harshly than modern flex does. The practical playbook is: do the safe DIY tasks well, document what you see with a camera, then hire a targeted professional scope with named equipment and before-and-after evidence. If that leaves you wanting a partner who can cover cleaning, repair, sealing, and sanitizing in one call, we’re glad to help.
Call (855) 974-7305 for a free estimate. We answer 24/7. Fast dispatch from 7am to 7pm, Sunday through Friday. The scope is written, the price is set per job, and you’ll see the difference before we leave.
Written by the team at Air Duct Cleaning Inwood.
See the difference
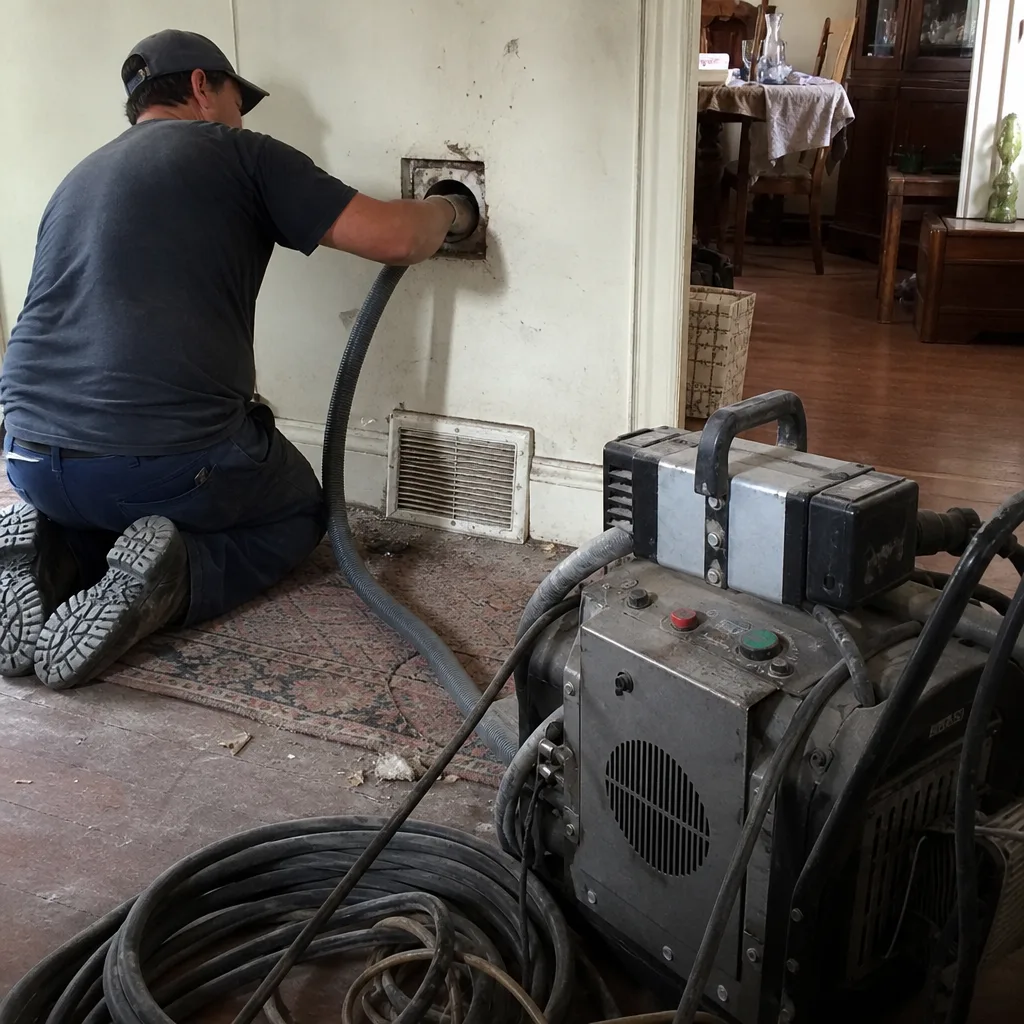 Before
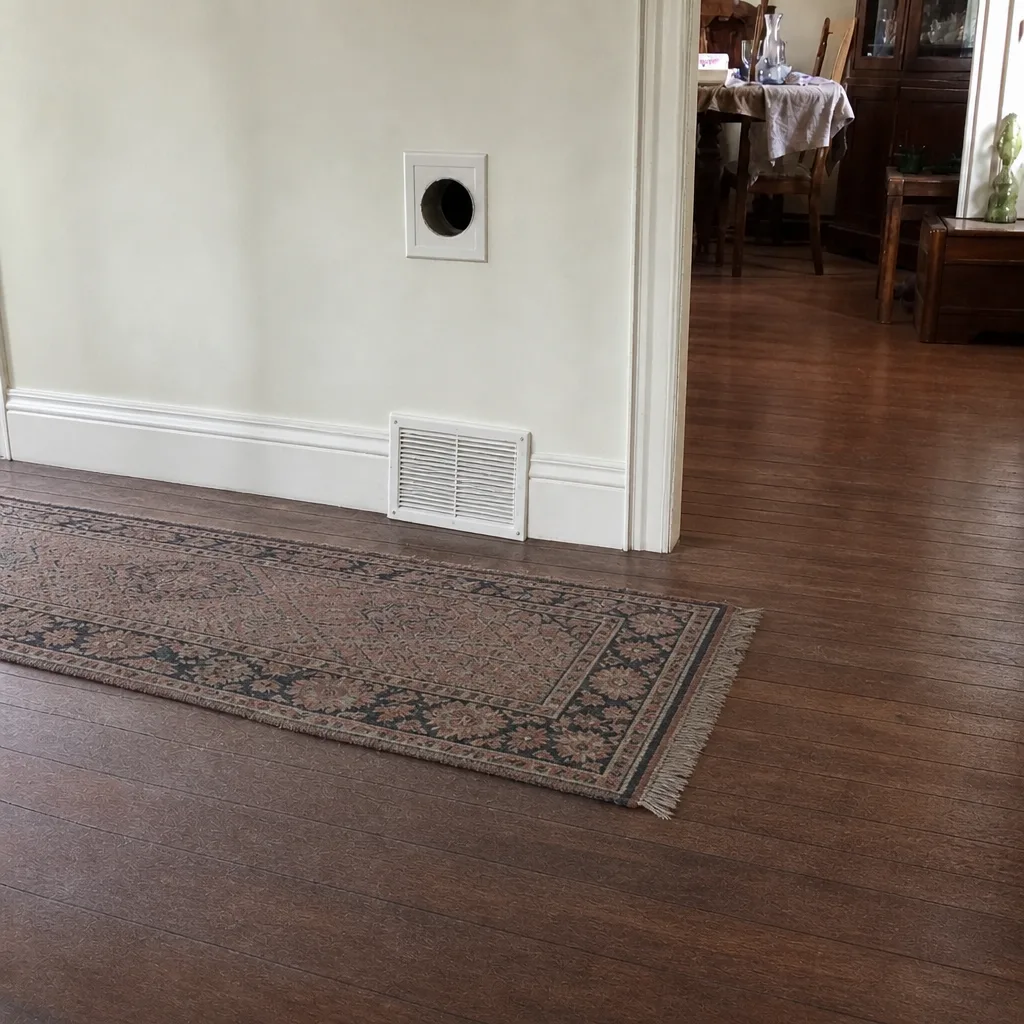 After
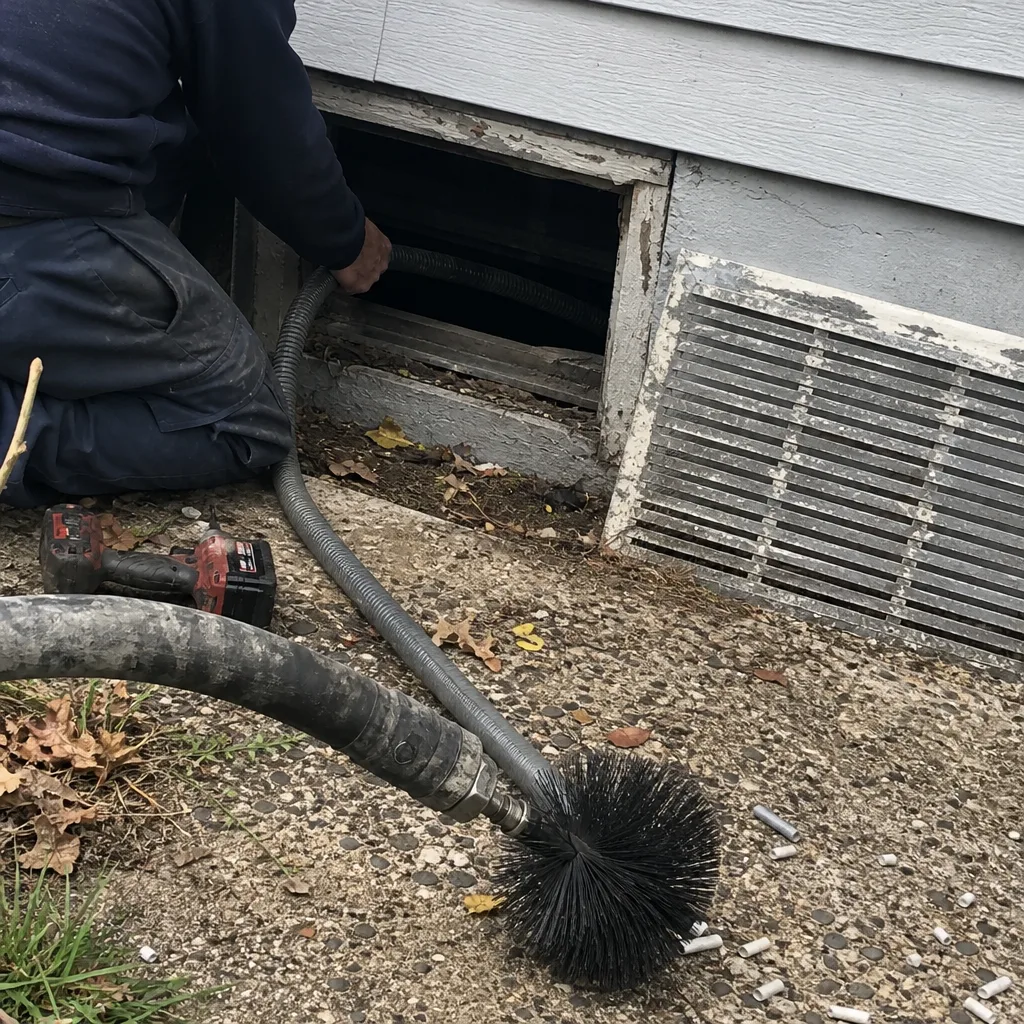 Before
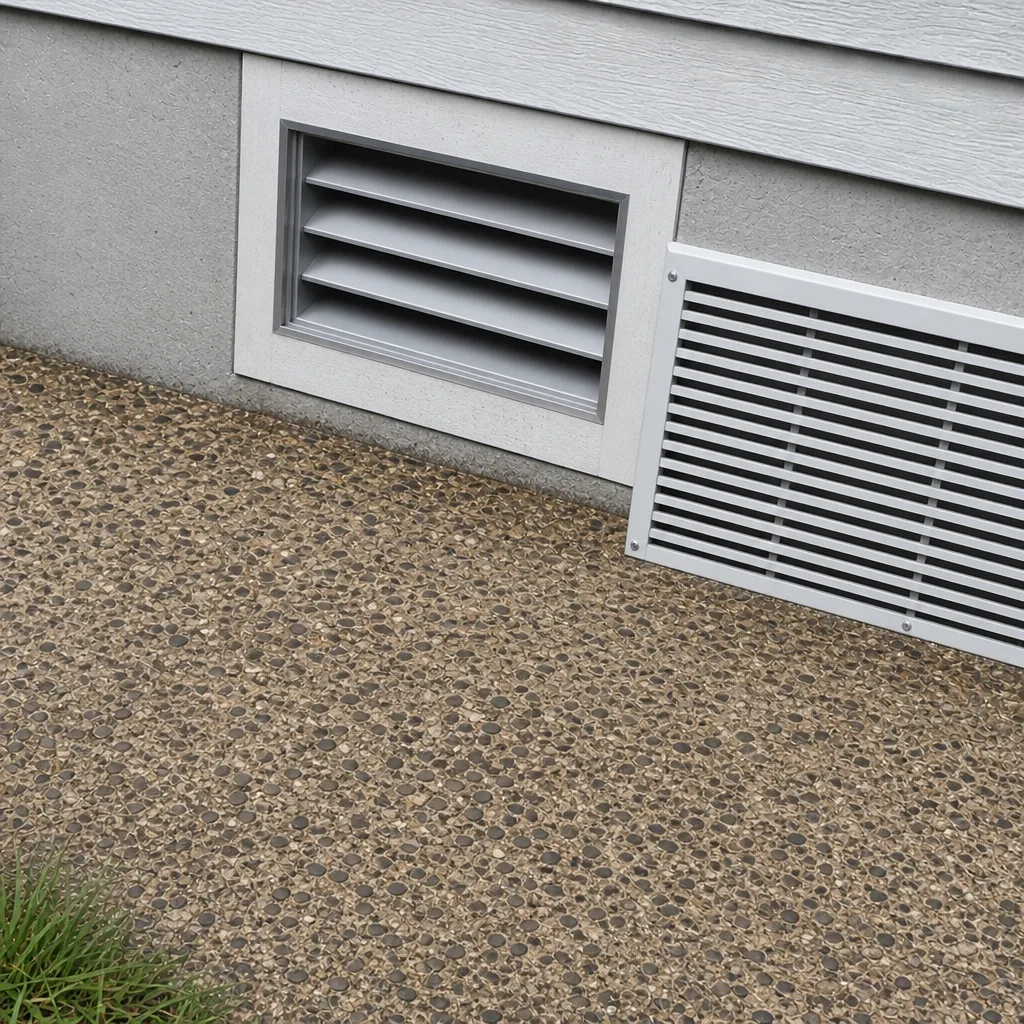 After
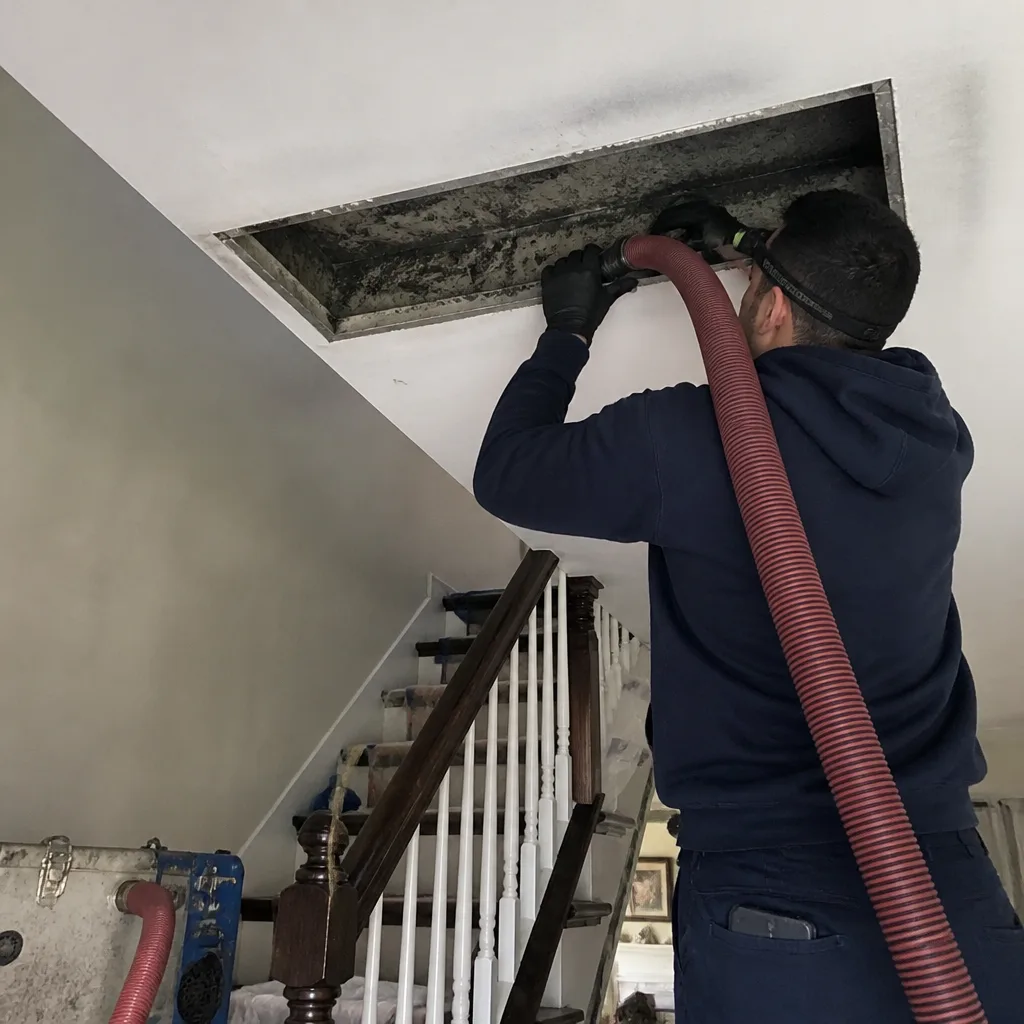 Before
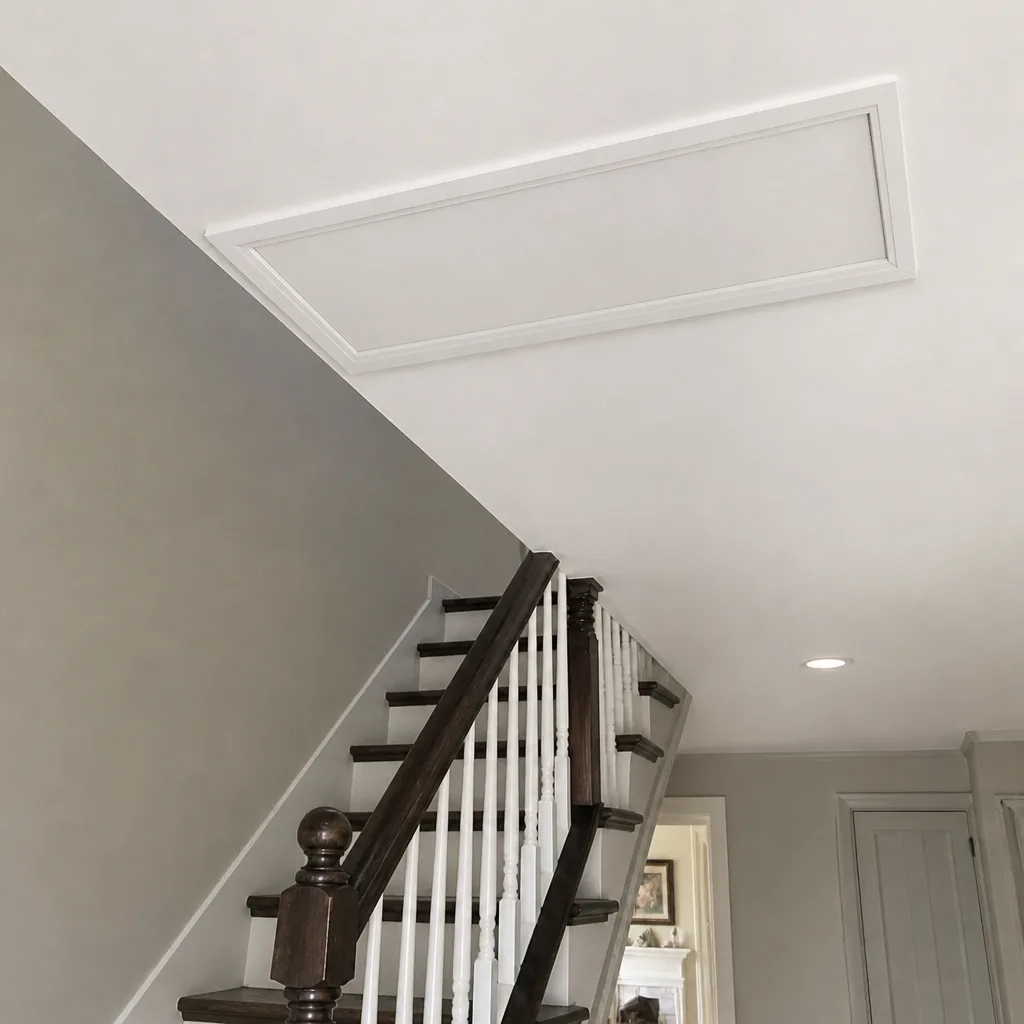 After